iCloud Photos vs Amazon Prime Photos vs Google Photos… and Google wins (IMHO)

I’ve been spending the past several days trying out different ways of getting my photos into the cloud.

First, I tried iCloud. Candidly, that was a terrible experience. As I was uploading my 180GB of photo and video files, iCloud rendered my Internet connection useless because it saturated the upstream connection; that caused me to write this post. But after I had gotten all of my data into iCloud, it became clear that iCloud wasn’t designed as a cloud-based photo backup service– instead, iCloud was designed to be your canonical photo store. This means that all your photos– on your iPhone, on your desktop, etc.– are simply mirrored, locally cached copies. If you don’t understand this, you’re not alone– neither do dozens of other people. I appreciate Apple’s attempts to make this work seamlessly, but personally, I want more control over my data. For example, if you enable iCloud for photos, you can’t delete photos off of your iPhone to free up space— Apple automagically does it for you when it thinks it’s time. Yes, you read that right. In addition, I would soon have had to start paying $9.99 per month because I was soon going to go over the 200GB limit. That wasn’t as big a deal, but given the other options, I decided to call it quits on iCloud Photos. So ix-nay on iCloud Photos for me.

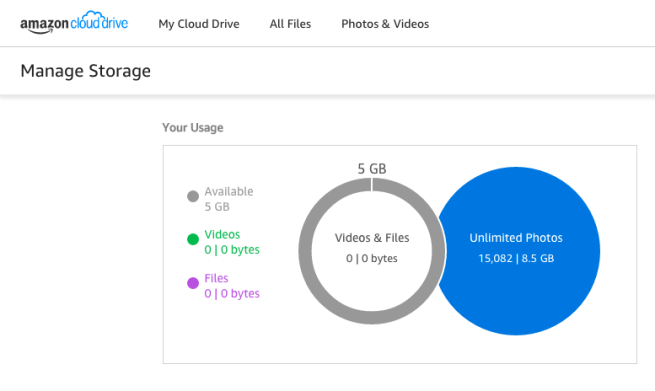
Next, I tried Amazon Prime Photos, which offers unlimited free storage for all photos. I already have Prime, so the incremental cost is zero for me. After syncing all my photos, I’m definitely a big fan. On my iPhone, I think that the basic browsing experience using the Amazon Photo app is superior to the native Photos app on the Mac.

However, I am just finishing up syncing my photos and videos into Google Photos, which is also free. Assuming you can live with their terms of service (which, by the way, are the same for Gmail), I think they are clearly head and shoulders above iCloud and Amazon for photos. I give Google the edge over Amazon Prime Photos for at least 3 reasons:

  1. The uploading experience using the Google Photos desktop uploader is an order of magnitude better than Amazon’s desktop cloud uploader. The Google Photos uploader will do true syncing of a local folder, while Amazon’s desktop cloud uploader requires you to keep dragging new files to your Amazon Cloud Drive. You can get around that using the technique I describe here, but it’s clunky compared to Google’s seamless uploader.
  2. In addition to storing all of your photos for free, Google will also allow you to store your videos for free as well. Amazon allows unlimited photo uploads but counts any videos against your cloud quota. Note, Google does impose size limits on photos, which Amazon does not do– so if you are a professional photographer and have a bunch of RAW photos, Amazon may be a better choice. But if you take most of your photos/videos with your mobile phone, Google’s ability to store everything you have for free makes it hard to beat.
  3. One killer feature of Google photos is Search. The image processing folks at Google have  worked some magic to make your images searchable by People, Places (using geotagging), and Things (Selfies, Beaches, Cars, Food, Christmas, Birthday, etc.). While it’s not perfect, it’s astoundingly good at making your photos searchable and completely changes your photo-browsing experience.

But the fourth reason for choosing Google– and the killer feature that for me was the most unexpected and delightful– is Assistant. Using its image-processing technology, Google will automatically suggest the creation of collages of like photos, panoramas from photos that have been autostitched together, animated gifs autostitched from a series of images, auto-styled images, stories like “Thanksgiving in Germany and Switzerland” complete with Indiana-Jones-style transitions, and full-on mini-movies. Here’s a snapshot of some of the Creations that Google put together for me:

To create these, I didn’t have to lift a finger– I just uploaded all of these to Google Photos and my iPhone just started notifying me that Google was piecing all of this together.

I’m in the technology business myself and it’s not often that a new piece of technology actually surprises and delights me. But I’ve got to hand it to Google– even if their terms of service are a bit big-brotherish, this goes in the doubleplusgood column.

With all that said, I’m going to keep syncing my photos to Amazon AND Google to limit my exposure in case something goes wrong with either company. As for Apple– sorry, Apple, for this round, you’ll have to try again.


Black Magic: Throttling uploads to Amazon Cloud Drive, Google Drive, and iCloud on Mac OS X El Capitan

One really frustrating thing about uploading your entire photo / video / music collection to one of the cloud services (Amazon Cloud Drive, iCloud, Google Photos, Google Music) is that it can easily saturate your Internet ISP connection, rendering it completely unusable for anyone in your household. From what I’ve seen, the services mostly tend to be greedy– they sop up all available upload bandwidth and make even simple browsing unbearable.

The best answer I’ve seen to this was hidden deep in a serverfault post about traffic shaping on Mac OS X 10.10 with pfctl and dnctl. These replace the ipfw commands in earlier versions of Mac OS X– dnctl is used for traffic shaping and pfctl is used for packed filtering. Note, this should work for both 10.10 (Yosemite) and 10.11 (El Capitan).

Without going into detail as to exactly how the following works, here’s a simple cookbook for how to do it. It’s complicated enough that suffice it to say that it’s just black magic, but the steps are very simple and it does work.

So: create two shell files. Call the first throttle_on.sh and paste the following contents into it:

#!/bin/bash

# Reset dummynet to default config
dnctl -f flush

# Compose an addendum to the default config: creates a new anchor
(cat /etc/pf.conf &&
  echo 'dummynet-anchor "my_anchor"' &&
  echo 'anchor "my_anchor"') | pfctl -q -f -

# Configure the new anchor
cat <<EOF | pfctl -q -a my_anchor -f -
no dummynet quick on lo0 all
dummynet out proto tcp from any to any port 443 pipe 1
EOF

# Create the dummynet queue. Replace 3Mbit/s with whatever you like.
dnctl pipe 1 config bw 3Mbit/s

# Activate PF
pfctl -E

Call the second throttle_off.sh and paste the following contents into it:

#!/bin/bash
dnctl pipe 1 config bw 0

To start throttling, simply issue the command:

sudo sh throttle_on.sh

and to stop throttling, simply issue

sudo sh throttle_off.sh

That’s it! You’re done. Now you can sync your photos, music, and videos to your cloud provider of choice in peace.

To see whether outbound traffic is being throttled, do a Spotlight search for “Activity Monitor”– a utility that is built in to Mac OS X. Open it and look at the Network tab. Here’s a screenshot of mine before and after running  throttle_on.sh– you can see that data dropped a ton (note, you can switch between “PACKETS” and “DATA” in Activity Monitor just by clicking that text at the bottom):

Screen Shot 2016-01-03 at 12.17.04 AM

To give credit where due– this is a minor modification of psmith’s serverfault post. The big difference is that it only shapes traffic on outbound port 443, which is the major port that appears to be used for all outbound cloud-based file synchronization. This means that most other traffic to and from the machine should be fine.

Uploading music files to Google Play Music keeps stalling on Mac OS X

With Google Play, I can now upload my entire music library into the cloud (I only have about 9000 songs) and access it anywhere in the world! Unfortunately, you have to get your songs into the cloud to begin with.

In theory, this should be easy– Google Music has a Chrome extension that is supposed to keep your iTunes library in sync with with your Google account. However, when I tried it (Mac OS X Yosemite 10.10.5, Chrome Version 47.0.2526.106 64-bit), it would keep stalling/crashing. I’m not the only one with the problem– lots of others have it as well: https://productforums.google.com/forum/#!topic/play/2I6w7em3Eb4

To fix this, I disabled the Chrome extension and downloaded the Mac OS X native Music Manager and directed it to sync iTunes. That worked for a while, but then it started to crash as well– not as often, but still frustrating.

Looking at the logs (~/Library/Logs/MusicManager/MusicManagerHelper.log), there were no obvious errors, but it did suspiciously seem to crash while trying to parse certain .ipa files. These are the iOS application files that are contained, for legacy reasons, in ~/Music/iTunes/iTunes Music/Mobile Applications.

In any case, I suspect I could fix this by manually just adding all .mp3 files (thus skipping the .ipa files), but I decided to just hack through it by creating an Apple launchd job that auto-restarts Music Manager every minute if it isn’t already running. This seems to solve the problem.

To do this, open up Terminal and create the following file– fine to put it in your home directory. Name it com.google.musicmanager.plist

<?xml version="1.0" encoding="UTF-8"?>
<!DOCTYPE plist PUBLIC "-//Apple Computer//DTD PLIST 1.0//EN" "http://www.apple.com/DTDs/PropertyList-1.0.dtd">
<plist version="1.0">
	<dict>
		<key>Label</key>
		<string>com.google.musicmanager</string>
		<key>ProgramArguments</key>
		<array>
			<string>/Applications/MusicManager.app/Contents/MacOS/MusicManager</string>
		</array>
		<key>StartInterval</key>
		<integer>60</integer>
	</dict>
</plist>

Save it, and then run:

launchctl load com.google.musicmanager.plist

It should start running within a minute– you’ll see a headphone icon in the upper right corner of your screen.

When all of your music is finished uploading, just type the following to unload the launchd job:

launchctl unload com.google.musicmanager.plist

Syncing photos from Mac OS X Photos to Amazon Cloud Drive

Back in November 2014, Amazon announced unlimited photo storage for everyone with Prime membership. This means that if you have Amazon Prime, you can go to Amazon Cloud Drive and claim your online space. Photos don’t “count” towards your online cloud drive quota (although videos do)– see the snapshot below, where the quotas are clearly separated.

Screen Shot 2016-01-01 at 11.23.41 AM

If you’re like me and use iOS, though, it hasn’t been super-straightforward to figure out how to synchronize photos from the new Mac OS X Photos app to your Amazon Cloud Drive. Of course, you can use Apple’s iCloud Photos, but if you don’t want to use iCloud Photos for whatever reason– you’re on a budget, you want to diversify your precious photo collection away from Apple, or you’re just a geek– you may want to try uploading your photos to Amazon.

Important note: the following technique will sync the actual original photos, including dates and latitude/longitude information, but not additional metadata– e.g. Mac OS X Photos album information or any notes. If you want to do that, you should just a more comprehensive backup technique. In addition, in this version, I am excluding video files, which count towards the quota. But if you’re just looking for a straightforward way to move your original photos to the Amazon Cloud, read on!

While doing this is relatively straightforward, I had to figure out much of it myself. First, you could try Amazon Cloud Drive Desktop, but that has the disadvantage of requiring drag and drop of thousands of files and the inability to exclude video files, which do count towards your quota.

I tried a few other things, including DriveSink, but ended up deciding that rclone was the easiest tool to use. From here, I’ll just give you precise step-by-step instructions for how to use rclone to sync your photos to your Amazon Cloud Drive. Note: to follow these, it’s best if you are reasonably familiar with Unix and Terminal commands.

First, open up Terminal– it’s built in to Mac OS X.

Download rclone:

curl -O http://downloads.rclone.org/rclone-current-osx-386.zip

Unzip it:

unzip rclone-current-osx-386.zip

Copy it to /usr/local/bin (or your favorite directory in your path):

sudo mkdir -p /usr/local/bin
sudo cp rclone /usr/local/bin

Configure rclone to sync with your Amazon drive:

rclone config

You should get text that looks like this:

e) Edit existing remote
n) New remote
d) Delete remote
q) Quit config

Choose n. I used the name clouddrive when prompted for a name. Choose Amazon Cloud Drive when prompted for the source type. Leave the application client id blank and the secret blank. What then happens is that rclone pops up a web browser that prompts you to log into your cloud drive account and establishes a hidden file (~/.rclone.conf)  that allows rclone to sync to your Amazon Cloud Drive.

Now you’re ready to sync your photos to Amazon! The photos in the Apple OS X photos app appear to be located here by default:

cd ~/Pictures/Photos\ Library.photoslibrary/

And the original photos appear to be located in the Masters subdirectory. From here, let’s make sure it does what you think it will do:

rclone sync -v --dry-run --bwlimit 2M --include '*.{JPG,jpg,PNG,png}' Masters clouddrive:photobackup

The –dry-run flag says what it intends to do without actually doing it. If the output looks correct, go ahead and remove the –dry-run flag and start the task. This will create a top-level directory called photobackup on your Amazon Cloud Drive and start synchronizing all pictures to it:

rclone sync -v --dry-run --bwlimit 2M --include '*.{JPG,jpg,PNG,png}' Masters clouddrive:photobackup

I added the –bwlimit because if you don’t, you can sop up all the upload Internet bandwidth in your house and you could make your family upset with you! See the rclone docs for more information and adjust the parameter as you see fit. Note that Mbps (megabytes per second) is very different from mbps (megabits per second)– Google has a built-in megabit to megabyte conversion calculator if you want to calculate. If you’re not concerned about throttling your connection, though, just remove the –bwlimit argument and go full speed ahead!

At this point, I’m waiting for the upload to finish– it can take a very long time (days even) depending on how fast your upload connection is and how many gigabytes of photos you have.

With that said, you can immediately start browsing your photos. You can go to https://www.amazon.com/clouddrive to see them or your can browse them  on your iPhone/iPad/etc. using the excellent Amazon Photos app. Candidly, I was surprised by how good the Amazon Photos app is– browsing thousands of images is effortless and, from my perspective, snappier and faster than the native Photos app on my Mac.

Overall, I was surprised by how easy the whole process was. Next on my list is to schedule a launchd job to execute the rclone command on a daily basis so that all my latest photos can be uploaded to the Amazon cloud!

Updates:

  • If you are using iPhoto 10 or 11 (instead of Photos), use: cd ~/Pictures/iPhoto Library.photolibrary instead of the above. For other versions of iPhoto, see the necessary paths here.
  • If you want to upload additional image types (e.g. RAW files) or movies, simply modify the include command above: –include ‘*.{JPG,jpg,PNG,png,MOV,mov,RAW,raw}’. Just note that movies will count against your Amazon Cloud Drive quota (photos won’t), and RAW files *might* (see about RAW photo files for details).
  • When you start doing this, you can easily make your life miserable by using up all of your upstream Internet bandwidth. This affects things like browsing, among other things. To get around this, see my blog post on throttling uploads.